Learning how to use a compass is a skill that everyone who enjoys the outdoors will find useful and can be essential if you walk in isolated areas or in more challenging conditions. To navigate successfully you will need to use your compass alongside a map – so first make sure you are comfortable with reading maps. In urban areas and lowland countryside (in good visibility), good map readers can navigate well without using a compass.
Even with a GPS in your phone, knowing how to navigate using a map and a compass is a great life skill. Here's a step-by-step guide to using compass bearings.
We're going to assume you are working with the most common type of compass used for navigation, the baseplate (or orienteering) compass, and know what the various bit are called. If not have a quick look at our beginners guide to the compass first.
Step 1: Line up your points
To start with you need to know where you are on the map (point A) and where you want to go to (point B).
Get the map flat - a stiff map case, flat rock or your knee works.
Line up point A and B with either the side of your compass or one of the black lines running down the base plate, making sure that the direction of travel arrow is point in the direction you want to go in (so towards point B).
A compass with a larger base is useful here for covering longer distances, but you can use a straight edge with a smaller compass.
For the moment, don't worry about the north arrow.

Compass bearings step 1: line up your points
Step 2: Align to grid north
Now, hold the compass still and turn the compass housing bezel so that the “N” on the bezel and the orienteering arrow are point to grid north (the top of the map). To help do this – make sure that the orienteering lines are lined up with the easting lines on the map.
Try to get this as accurate as possible - and if you have folded your map check which way is north!
Again, ignore what the compass needle is doing at this stage.
Compass bearings step 2: align to grid north
Step 3: Adjust for magnetic variation
Now you need to allow for the difference between magnetic north and grid north.
We're lucky in the UK that this variation is small, but where accuracy is important, you need to adjust for it.
The adjustment varies across the country and you can generally find it printed on your map in the key. Look for 'magnetic north'. Ignore any references to 'true north' as we don't need them. At the moment GB magnetic variations are between -1° and 4°.
Pick up your compass and turn your compass bezel anticlockwise to ADD the positive magnetic variations, or clockwise to SUBTRACT negative variations.
Many compasses have a smaller scale inside the compass housing to make this easier, or use the outer scale. Most compasses only show a marker for every 2 degrees.
With such a small variation for GB you can often ignore it, but it can become critical in some parts of the world or in featureless areas.
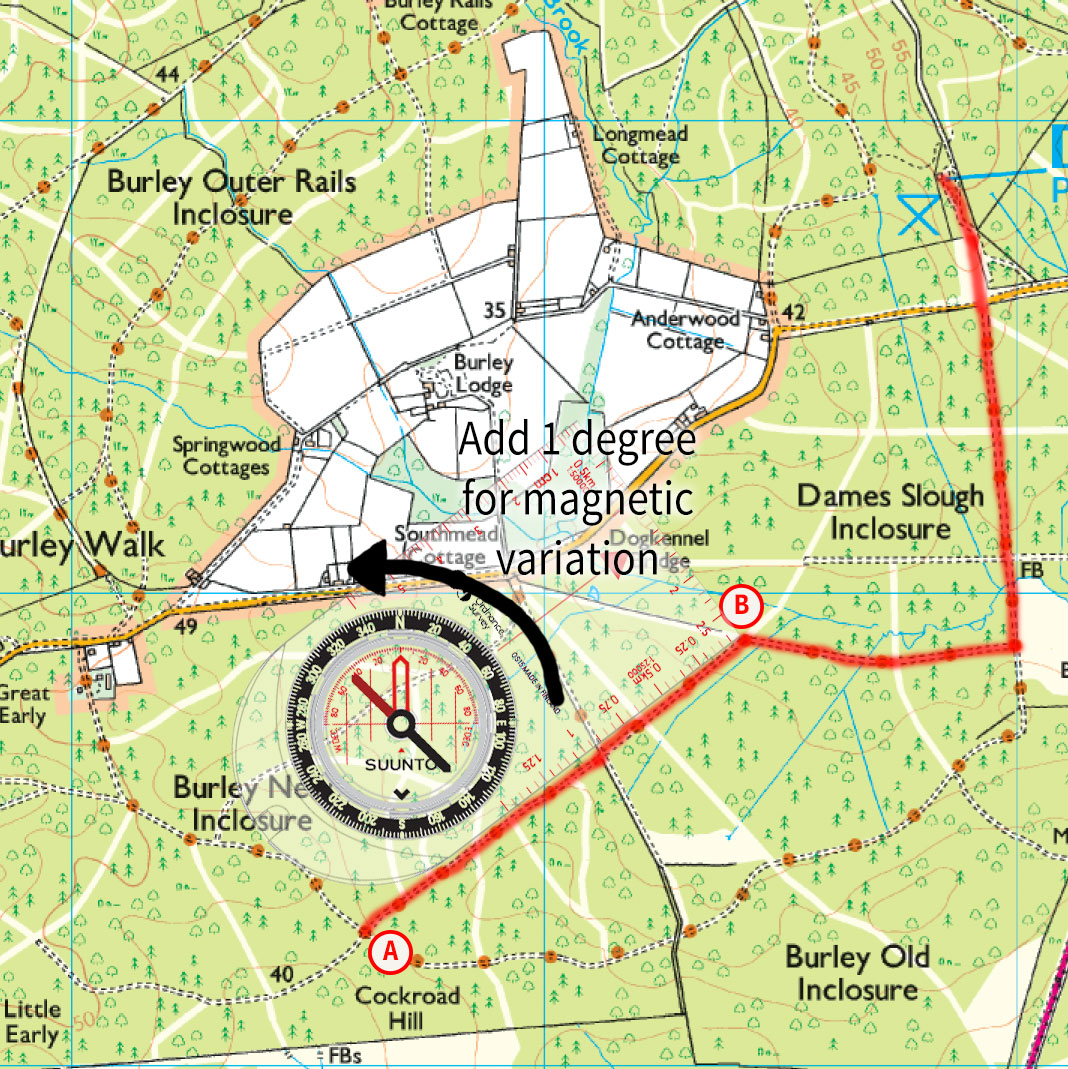
Compass bearings step 3: adjust for magnetic variation
Step 4: Line yourself up
Now put the map away. Be careful you don't move the compass bezel.
Hold the compass flat and near your body, with the big 'direction of travel' arrow pointing straight ahead. Turn yourself and the compass around slowly until the red end of the needle lines up with the orienting arrow, as in the picture.
The direction of travel arrow should still point straight ahead - that's the way you are going, towards B.
Look up, and pick an object in the distance that's in exactly the right direction. It could be a distinctive tree, rock, hill peak or similar. Don't use sheep, as they tend to move.
Try to avoid looking at the compass all the time as you walk, as this is less accurate than using a more distant target. If you reach the target you are aiming for check the compass again, pick a new target object and carry on until you reach your next waypoint.
The biggest errors by beginners here are firstly moving the bezel - it's set and should not be changed at this point. Secondly, not holding the compass pointing directly away from the body. Also, be aware of any magnets or metal near the compass: mobile phones, magnetic buttons, metal belts and similar can 'deflect' the compass needle, making it inaccurate.
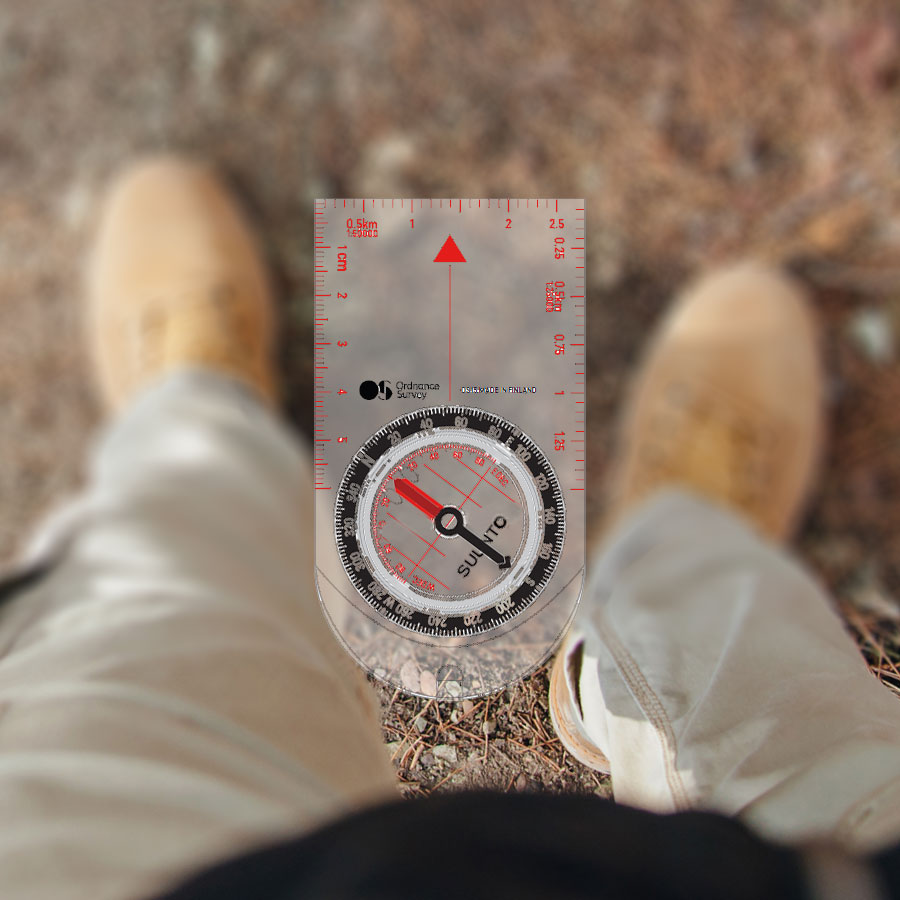
Compass bearings step 4: line yourself up
How to take a compass bearing with Steve Backshall
Top tips for beginners
If you’re unsure about using a compass the best thing to do is get the map of an area you know really well, where you wouldn’t usually need a map to get around. Take yourself off for a walk, using the map and a compass to navigate your way as you reach each turning. This way you shouldn’t get lost and you can compare that the direction you think you should be travelling in matches what the compass is telling you!
- Make sure that the direction of travel arrow is pointing in the direction you want to walk in – it’s called the direction of travel arrow for a reason!
- Always make sure that the orienting arrow is pointing to grid north (the top of the map) rather than grid south (the bottom of the map) – even if you are walking south – the orienting arrow still needs to point north.
- Unless you always want to walk due north – follow the direction of travel arrow rather than the compass needle. The compass needle stays above the orienting arrow in or very close to the compass housing.
- Make sure that the landmark you pick is a feature on the landscape that is not liable to move – pick a tree, gate post, gorse bush or boulder for example rather than a cow, sheep, person or bird!
Practice route
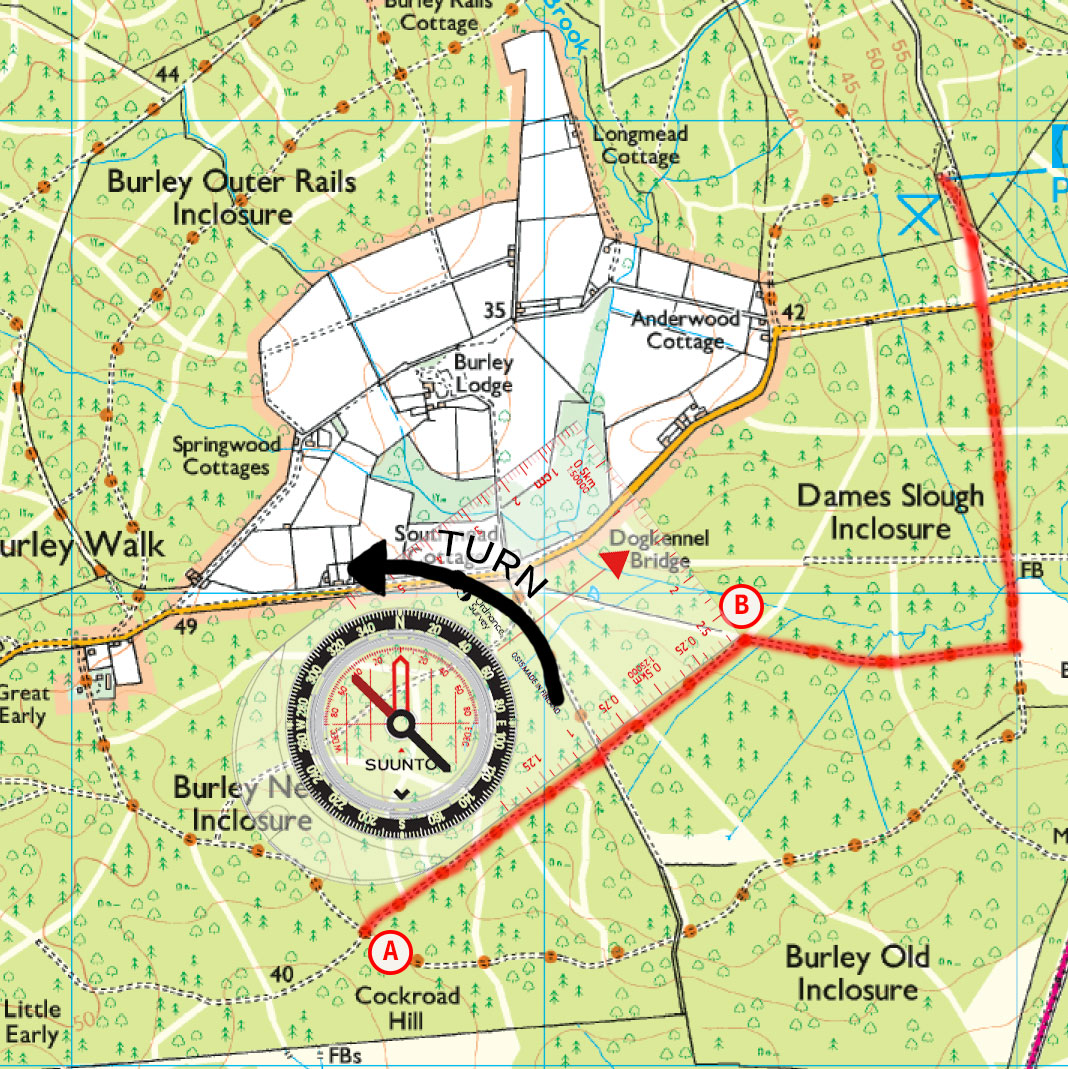
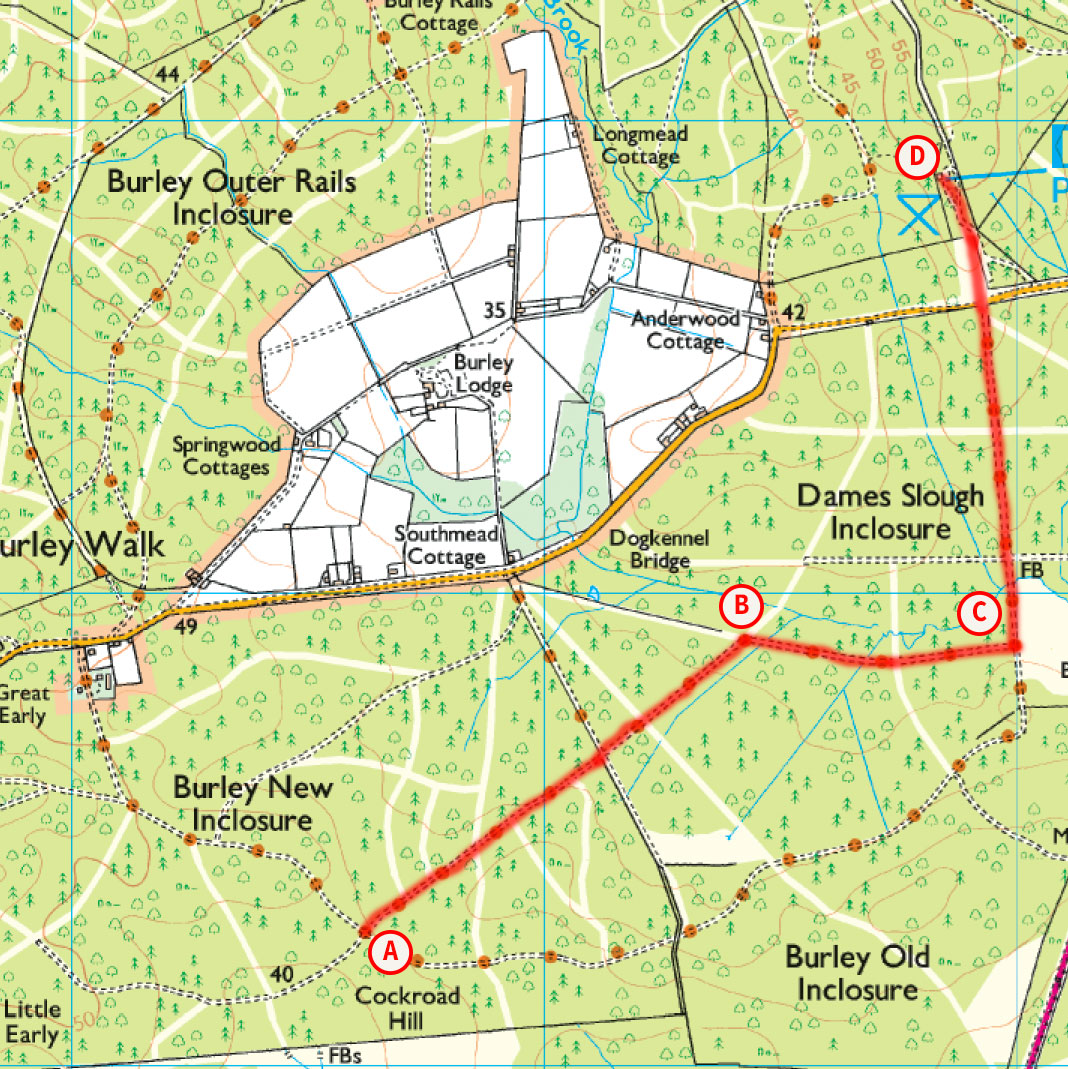 Here's a practice route showing the settings for each leg.
A to B
SU 236 042 to SU 244 048
Initial measurement: 52° from north
Add 1° for variation
Heading: 53°, distance: 1.01 km
B to C
SU 244 048 to SU 250 048
Initial measurement: 91° from north
Add 1° for variation
Heading: 92°, distance: 0.59 km
I've ignored the slight kink in this path, but in poor conditions add an intermediate waypoint.
C to D
SU 250 048 to SU 249 058
Initial measurement: 352° (just off true north)
Add 1° for variation
Heading: 353°, distance: 0.96 km