


The single most dangerous element in any survival emergency is a lack of readiness. When circumstances force you to find or build shelter unexpectedly, your knowledge of the landscape and your ability to stay calm may be the only tools you truly possess. Being familiar with natural materials, terrain, and weather gives you a strong edge when the situation becomes serious.
Preparing mentally is just as important as preparing physically. The more you understand the basics of shelter construction, the more confidently you can respond when your surroundings start working against you. Continue reading to learn how to build dependable survival shelters in a wide range of environments, even when your resources are extremely limited. Knowledge—and the ability to adapt it—is the strongest piece of gear you can ever carry.
What Exactly Is a Survival Shelter?
A survival shelter is any protective structure, whether natural or built by hand, that provides safety from wildlife, biting insects, rain, wind, and extreme temperatures. These shelters might take the form of snow burrows, cave-like spaces dug into drifts, or wooden A-frames built from branches and plant debris. The appearance varies depending on the environment, but the purpose never changes: you must create a barrier between yourself and the elements.
Shelters regulate your body temperature, reduce exposure to harsh weather, and help prevent fatigue. Without them, even a mild environment can become deadly. Understanding the concept behind a shelter—protection, insulation, and stability—makes it easier to improvise one from whatever materials nature offers.
Wilderness Survival Shelters
Anyone who has heard of the “rule of threes” already knows the critical importance of good shelter: in many harsh climates, you may not last more than three hours without protection from weather. When conditions turn severe, that clock begins ticking the moment you’re exposed.
If you’re stranded during a desert heat wave or caught in a sudden mountain storm, the shelter you build or discover becomes your primary line of defense. Cold environments and wet conditions are especially dangerous. Once moisture soaks into your clothing, keeping warm becomes extremely difficult. Staying dry should be one of your absolute priorities, no matter what kind of structure you choose to build.
Even when you lack ideal terrain or materials, several strategies can help you stay as dry as possible:
• Elevate your sleeping area whenever you can. Sleeping directly on the ground drains your body heat and increases moisture exposure. Raising your bed using branches or debris offers both insulation and insect protection.
• Seek natural cover if possible. Caves, overhanging rock shelves, or large trees create valuable barriers from weather and buy you time to gather more materials.
Do everything in your power to keep your clothing and skin dry. Once your body becomes soaked, restoring warmth becomes a slow and difficult battle, even if you’ve already built shelter.
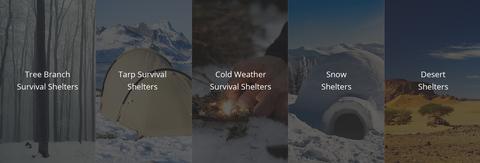
Tree Branch Survival Shelters
Branches are some of the most practical building materials you can work with in any forest or wooded region. They vary in thickness, can be bundled or leaned, and require almost no tools to manipulate. Whenever possible, avoid wasting precious energy on heavy cutting. Save your strength for gathering water and staying warm, especially if you’re uncertain how long you’ll be exposed.
• Round lodge: This structure shares similarities with a tipi, but it provides tighter insulation and the possibility of a well-formed doorway. One of its biggest advantages is the option to leave space for a smoke hole, allowing safe fire use inside the shelter.
• Debris shelter: These shelters often take the shape of an A-frame made from sticks and covered with natural materials such as bark, pine needles, or leaves. Debris acts as insulation, adding layers that slow down heat loss and guard against wind and rain.
Debris alone, however, won’t withstand harsh storms or strong wind gusts. Incorporating mud or clay into your structure strengthens it dramatically and keeps gaps sealed. Forest environments usually provide everything you need: fallen limbs, packed soil, and thick layers of natural foliage.
Working with what the forest already provides saves time and energy. If you need guidance for making a shelter with no tools at all, you can explore video demonstrations online that focus on fully primitive construction techniques.
Tarp-Based Survival Shelters
If you’re carrying a tarp—or even a large sheet of waterproof fabric—you’ve already made survival much easier. A tarp can be adapted to several shelter patterns, each serving different needs depending on the terrain and weather.
• Tarp wing: This structure offers partial cover from rain and wind. Combined with a fire, it reflects heat back toward your body and gives you temporary protection while you prepare something more secure. Because it’s open, it works best as a short-term setup.
• A-frame tarp: This design creates a triangle-shaped shelter by suspending a rope or paracord between two trees, then draping the tarp over the cord. The sides should be weighed down with logs or rocks to keep wind from lifting the tarp. It offers strong protection from rain and moderate wind but provides minimal insulation.
• Wedge tarp: This option shines in windy conditions and requires very little natural resource gathering. By securing the corners and propping up one side, you create a slanted surface that blocks aggressive wind and rain. If you have paracord in your survival kit, constructing a wedge becomes even faster.
• Tarp burrito: When your options are extremely limited, wrapping yourself in the tarp can be enough to preserve heat. Laying soft debris beneath you increases insulation and helps keep moisture from creeping through the ground into your clothing.
Cold Weather Survival Shelters
Facing frigid temperatures with minimal equipment is one of the toughest challenges in wilderness survival. When the air itself steals warmth from your body, your shelter must work overtime to conserve every degree of heat you produce.

• Insulation from nearby materials: Moss, mud, snow, leaves, and tree branches can all help hold warmth inside your shelter. Combining materials to create thick walls dramatically improves your ability to stay warm.
• Protecting the ground layer: The earth absorbs body heat rapidly. Whether you build an elevated bed or create a thick bedding of branches and foliage, insulating the ground beneath you is essential.
If you lack tools to construct a proper bed platform, pile layers of dry debris, grasses, and leaves until you form a thick buffer between yourself and the ground.
• Wilderness fire considerations: Be careful when lighting a fire near rocky overhangs or inside caves. Smoke buildup can become dangerous quickly, and sudden heat can weaken or shift rocks. In handmade shelters, fires are safer as long as the structure includes an intentional opening for ventilation.
To start a fire without matches, you’ll need a well-prepared tinder bundle. Eyeglasses, a clear plastic bottle of water, or any reflective object can help focus sunlight enough to spark ignition. Another option is a friction bow—created from vine or cord—that spins a vertical stick rapidly enough to form embers.
Once your tinder catches, have a second pile of fuel ready to keep the flame alive.
Cold climates are usually damp, which makes ignition more difficult. If smoke gathers inside your shelter, carry your burning bundle outside before building the main fire.
Snow Shelters
Certain mountain regions and cold environments present conditions where nearly all usable materials are frozen. In these places, snow itself becomes your main building resource. Although constructing a snow-based shelter may seem strange at first, properly shaped snow can insulate extremely well. If you find yourself stuck during a snowstorm, time becomes critical. You may have only a short window to create a structure that shields you from wind, moisture, and plummeting temperatures.
• Quinzhee: A quinzhee is essentially a large mound of snow that you hollow out to create a protected chamber. It may look simple from the outside, but a well-made quinzhee can trap warmth, reduce wind exposure, and keep drifting snow from burying your sleeping area. Start by piling snow to a height of seven or eight feet. The snow should be packed and given enough time to settle. Once compacted, carefully dig an interior cavity large enough for your body and gear. If possible, place straight branches into the ceiling during construction; they help distribute weight and reduce the chance of collapse. Always keep your quinzhee rounded, since sharp edges or flat spots weaken the structure under heavy snow loads.
• Snow cave: A snow cave can be highly effective when built correctly. However, a poorly constructed cave can collapse or trap dangerous cold air inside. Avoid powdery snow entirely—it lacks the strength needed to form stable walls. Look instead for hardened, compact snow that behaves more like icy crust. Dig a tunnel leading into a round interior chamber and carve out the inside slowly, paying close attention to ceiling thickness. A small raised sleeping platform can reduce the cold-air pooling effect, keeping you slightly warmer throughout the night.
• Igloo: Unlike quinzhees or caves, an igloo is built from blocks of compacted snow or ice. To build one, you need a tool that can cut uniform blocks from dense snowpack. Check each block’s strength before stacking it. Outline the footprint of your structure using a stick or the tip of a tool. This guide helps you maintain symmetry as you spiral upward. Build one ring of blocks at a time, angling them inward gradually so the structure forms a dome. As you reach the upper levels, the blocks will naturally lean against one another, creating surprising strength when the dome closes.
Tips for Building Survival Shelter in Snowy Conditions: The most important part of any snow shelter is its ability to shield you from the wind and retain warmth while still allowing airflow. Even in freezing weather, ventilation is vital. Without proper airflow, carbon dioxide can build up while you sleep. A small ventilation hole near the top can make the difference between a safe shelter and a dangerous one. Always check the weather throughout the night if possible; heavy snow accumulation on your shelter requires occasional clearing to prevent structural failure.
Desert Shelters
Building a shelter in the desert demands a different mindset. These environments swing between brutal heat during the day and unexpectedly cold nights. Natural building materials are rare, and shade can be scarce. When traveling through any desert region, having supplies like a tarp, cordage, or reflective material becomes extremely important. Creativity is your greatest asset in such conditions.
• Ramada: The ramada is a basic roof-only shelter designed primarily for shade. In desert heat, reducing direct sunlight on your body prevents dehydration and dangerous overheating. Constructed with upright supports and a flat roof of brush, cloth, or tarp, a ramada provides essential sun protection while allowing airflow underneath. Although it offers almost no insulation, it dramatically lowers radiant heat exposure—a critical factor in dry desert climates.
Tips for Building Survival Shelter in the Desert:
If your resources are limited, search for any dry shrubbery, dead branches, or rocky outcroppings that can serve as the backbone of a primitive structure. Shade is your primary need. If you have a tarp, use the same principles as you would in forest terrain, anchoring it to create even the slightest relief from the sun. When possible, position your shelter so it blocks windblown sand and reduces exposure during the hottest hours of the day.
Packing a Survival Tent
Having a compact shelter option in your pack can be a major advantage when conditions turn unpredictable. Lightweight emergency tents or simple tarps give you immediate protection from rain, wind, or freezing temperatures, which is crucial when you’re already tired or limited on daylight. Many modern emergency tents are made from reflective materials such as Mylar, which help trap body heat and reduce the risk of hypothermia. Their waterproof surface also keeps you insulated from ground moisture and sudden weather changes.
Whether you prefer a minimalist plastic sheet, a reflective emergency bivy, or a foldable tarp, the important thing is to carry something that allows you to put up quick protection when the environment offers little to work with. These compact tools weigh almost nothing and can fit into any hiking pack, making them a smart backup even when you plan to build a natural shelter. Solid preparation gives you options, reduces stress, and helps ensure you stay warm, dry, and safe no matter where your journey leads.