


Learning to use a compass alongside a map is one of those outdoor skills that quietly becomes invaluable the moment something goes wrong — when visibility drops, trails disappear, or you’re exploring unfamiliar ground. Even if you’re comfortable reading maps on their own, a compass adds precision, confidence, and the ability to navigate safely across featureless landscapes. It’s also something you can rely on when batteries die or your phone loses signal in the middle of nowhere.
People often assume compass work is complicated, but once you understand the logic behind bearings and how a baseplate compass interacts with a map, it becomes surprisingly intuitive. With a bit of practice and patience, you’ll be able to use it instinctively, lining up landmarks, adjusting for magnetic variation, and choosing reliable travel directions without relying on guesswork. Before diving in, it helps to already feel comfortable with basic map-reading — recognising symbols, identifying grid lines, and orienting the map so it matches the world around you.
Even though most of us carry GPS-enabled phones, the combination of a physical map and a traditional compass is still one of the most dependable navigation methods you can learn. What follows is a step-by-step guide that expands on each stage of taking and following compass bearings so you can build real confidence in the field.
How to Use a Compass with map
Step 1: Position Your Points on the Map

Before doing anything else, you need to know precisely where you’re standing on the map (point A) and where you intend to travel (point B). Getting this right sets the foundation for every step that follows. Spread your map out on something stable — your knee, a flat rock, or a map case will all work well. Avoid letting the map flutter in the wind, because even a slight shift can throw off your accuracy.
Once the map is flat, place your compass so that one straight edge or the long black guideline on the baseplate connects point A to point B. Make sure the direction-of-travel arrow on the baseplate points from your current position toward your destination. This detail matters more than beginners expect; reversing it will send you in the exact opposite direction.
If your compass has a longer baseplate, it can simplify lining up distant points, but even a smaller compass will work as long as you’re careful. At this stage, don’t look at the magnetic needle yet — it’s irrelevant until the bezel is set. Right now you’re simply creating a visual link between where you are and where you need to go.
Step 2: Align the Compass to Grid North
With your compass still fixed in place on the map, turn the bezel — the rotating housing — so the large “N” and the internal orienting arrow point toward grid north, which is always the top of the map. The faint parallel lines inside the housing, known as orienting lines, should line up neatly with the map’s vertical easting lines. These help confirm that the bezel is truly pointing in the right direction.
This step requires slow, deliberate adjustment. If your map is folded, double-check which edge is north so you don’t accidentally align things backward. You’d be surprised how often people misread a folded map and confidently follow a bearing that leads them in the wrong direction.
Again, completely ignore the magnetic needle at this point. You’re not navigating yet — you’re still setting up the bearing. Treat this step like tuning a musical instrument: small deviations may not seem like much on paper, but over a long hike they can lead you kilometres off track.
Step 3: Correct for Magnetic Variation
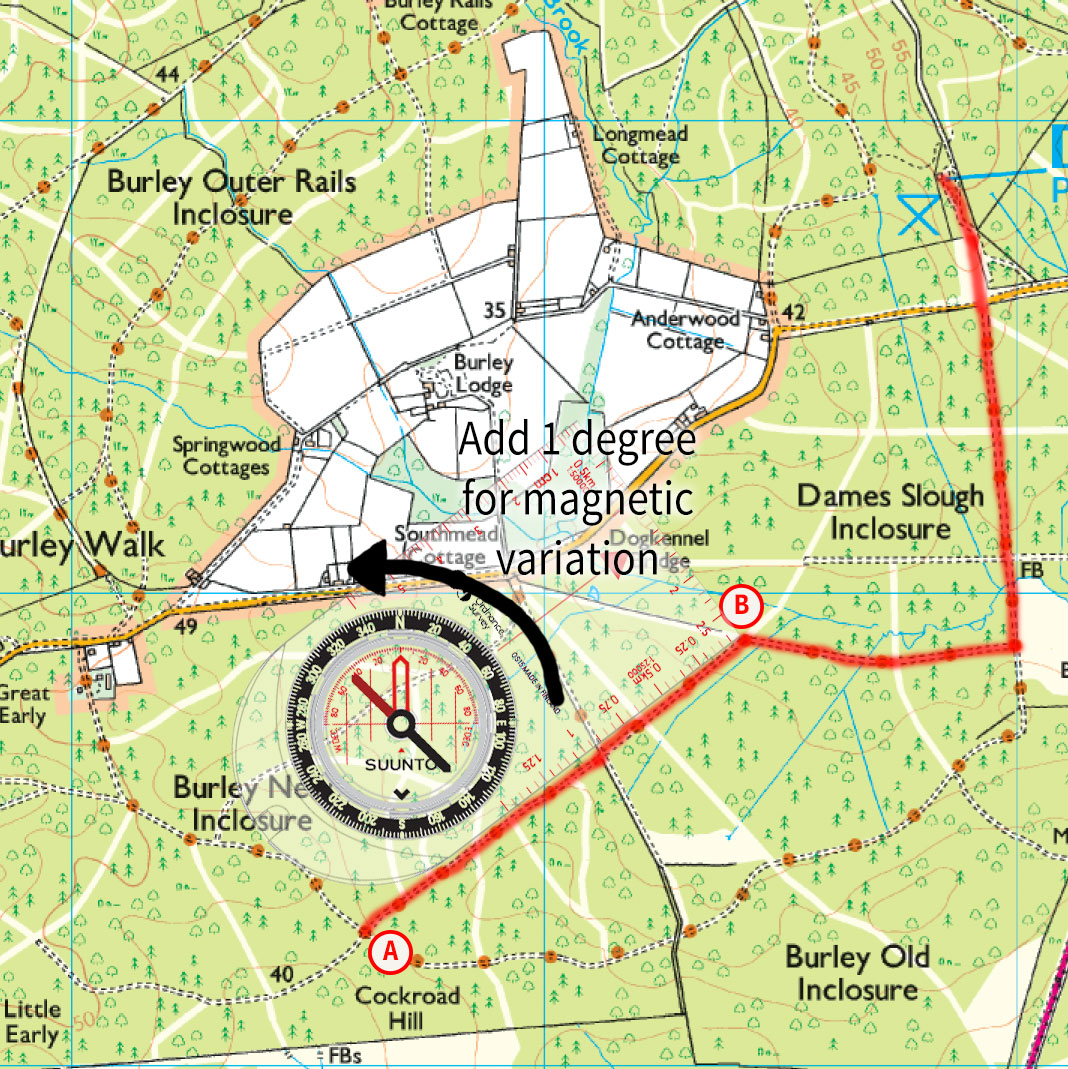
The next step is adjusting your bezel for magnetic variation — the difference between magnetic north (where your compass needle points) and grid north (the standard reference used on the map). In some regions this difference is extremely small, while in others it can be several degrees and must be accounted for to stay accurate.
Most maps print current magnetic variation information inside the legend. Look specifically for “magnetic north” adjustments and ignore anything that refers to “true north,” as it isn’t needed for compass bearings. In the UK, variations typically range from –1° to +4°, but the value changes slowly over time, so always check your map’s latest print date.
To adjust for variation:
• Turn the bezel anticlockwise to add a positive variation.
• Turn the bezel clockwise to subtract a negative variation.
Some compass housings include small inner scales to help you count degrees, though most only mark every two degrees. Even small adjustments make a difference when navigating over long distances or crossing featureless terrain like moorland, say nothing of regions with high variations such as parts of North America or Australia. In places like that, skipping this step could send you far off course.
Step 4: Align Yourself to the Bearing
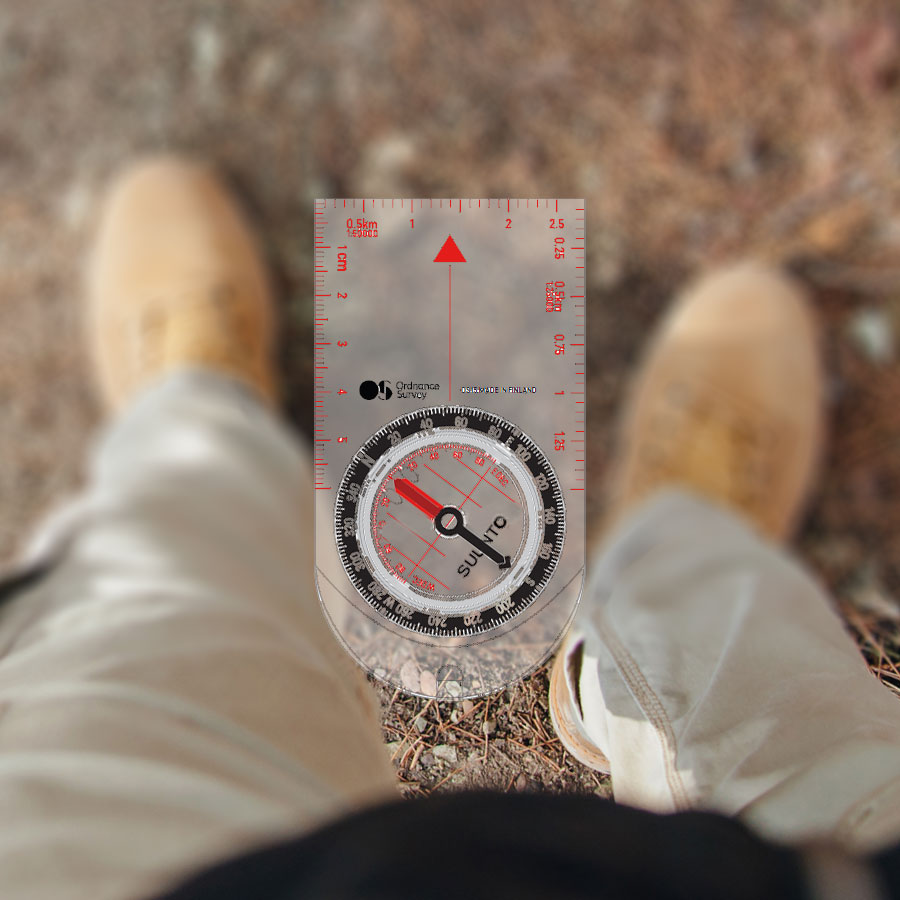
Now comes the moment where the map can be tucked away — just make sure you don’t twist the bezel, as the accuracy of the bearing depends on its exact position. Hold your compass level in front of you, keeping the direction-of-travel arrow pointing directly away from your chest. Your body should face the same direction as the arrow.
Turn your entire body slowly until the red magnetic needle settles and lines up perfectly with the orienting arrow inside the bezel. When the needle and the orienting arrow sit neatly on top of each other, your compass is officially aligned with the bearing you set on the map.
Raise your head and find a distant landmark that sits exactly along the direction of travel the compass is indicating — a distinct rock formation, a lone tree, a dip in the ridge line. Avoid choosing anything that can move, such as livestock or hikers. Walk toward that landmark rather than staring at the compass while moving; long-distance accuracy depends on keeping your eyes on fixed reference points.
Once you reach your chosen landmark, check the compass again and choose a new point further ahead. This leapfrogging method keeps you moving accurately even in rough or uneven terrain.
How to Take a Bearing With Steve Backshall
Top Tips for New Compass Users
If you’re still building confidence, one of the best exercises is to practice in a familiar area — somewhere with paths you already know well. Navigate using only your map and compass as you reach each junction or turn, and compare what the compass shows with what you instinctively believe is the correct direction. The contrast builds intuition surprisingly quickly.
Some practical tips:
• The direction-of-travel arrow must always point the way you want to walk.
• The orienting arrow inside the bezel should always face grid north when setting bearings — even if you’re actually walking south.
• Follow the direction-of-travel arrow, not the magnetic needle, once you’ve aligned them.
• Choose fixed features in the landscape for navigation, not animals or people that may wander off.
Practice Route for Improving Your Skills
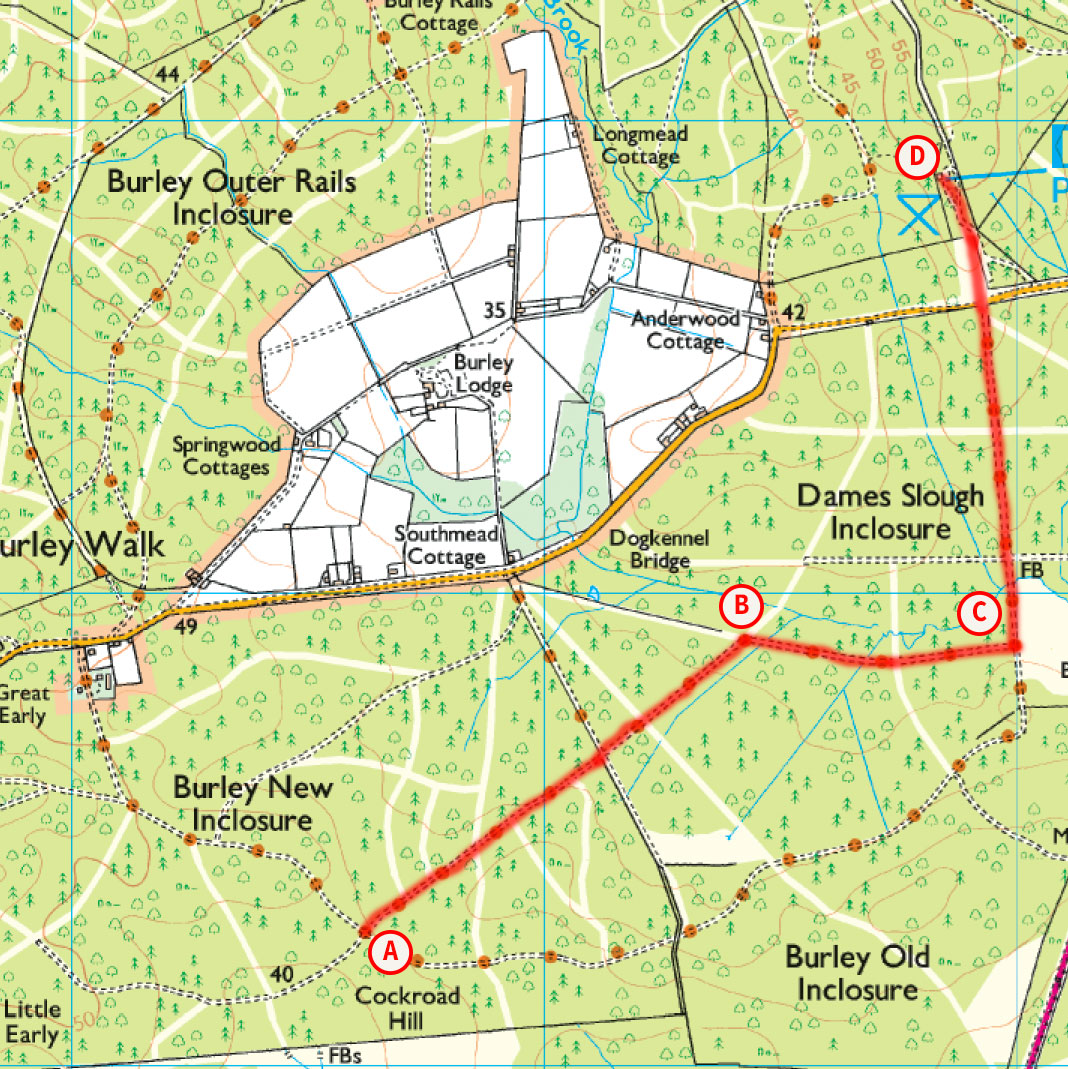
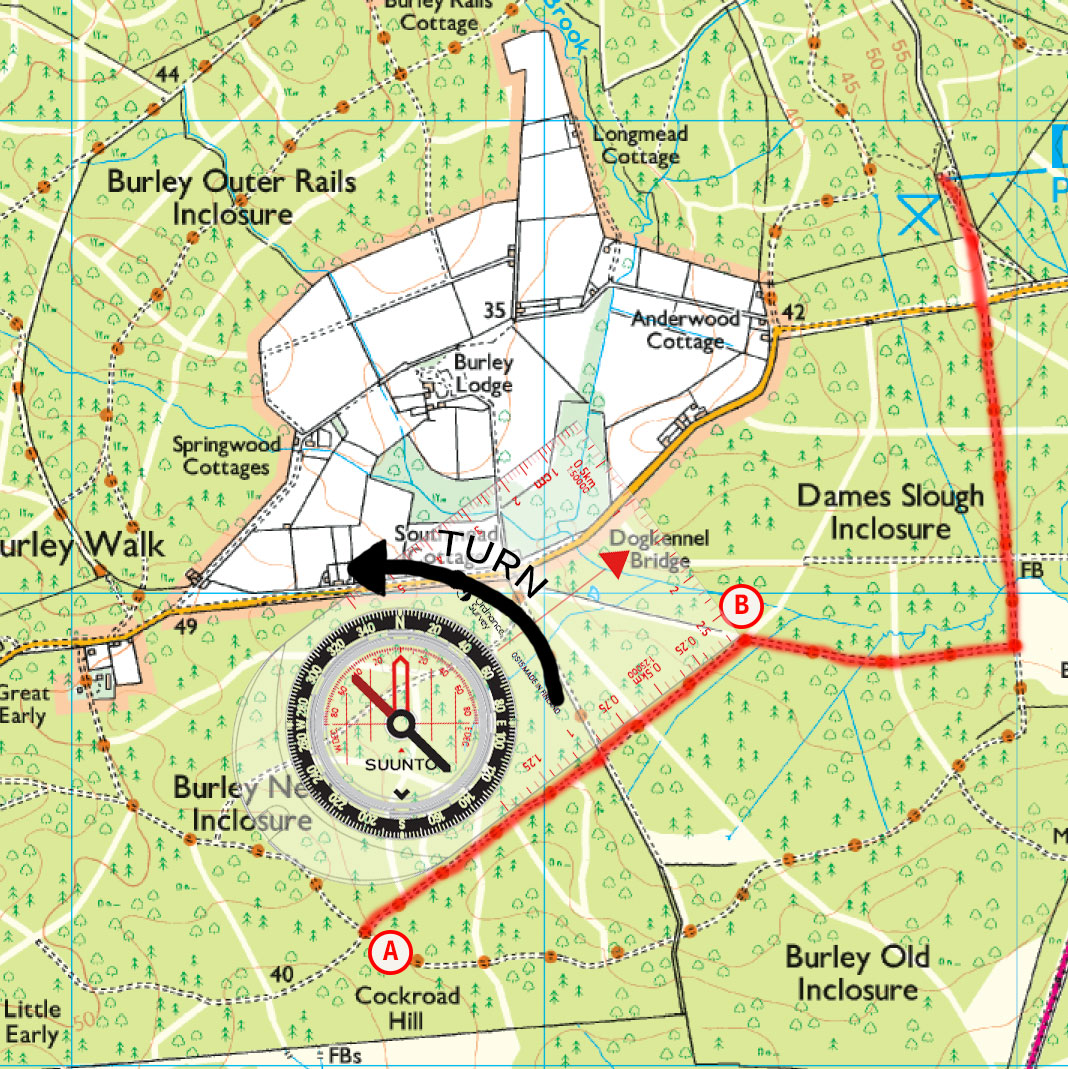
Here’s an example route showing bearing measurements between several points. Each leg demonstrates how to measure, adjust, and follow a heading with both distance and direction in mind.
A to B
SU 236 042 → SU 244 048
Initial measurement: 52°
Add 1° variation
Final heading: 53°
Distance: 1.01 km
B to C
SU 244 048 → SU 250 048
Initial measurement: 91°
Add 1° variation
Final heading: 92°
Distance: 0.59 km
(In poor weather, consider adding an intermediate waypoint.)
C to D
SU 250 048 → SU 249 058
Initial measurement: 352°
Add 1° variation
Final heading: 353°
Distance: 0.96 km